Purpose
Prerequisites
An existing layout
Steps
- Select Quick Dimension from the Dimension menu or click
 .
.
The following prompt displays:

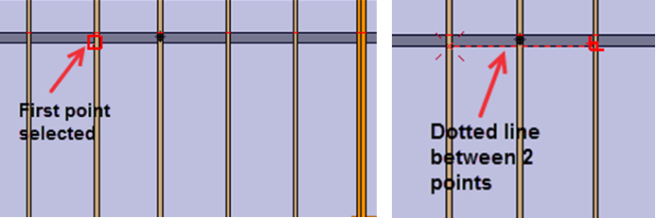
- Select the first point or two lines that intersect at a point.
A dashed red line is anchored at the first point and extends as the cursor is moved to the second point.
The following prompt displays:

- Select the second point or two lines that intersect at a point.
The following prompt displays:

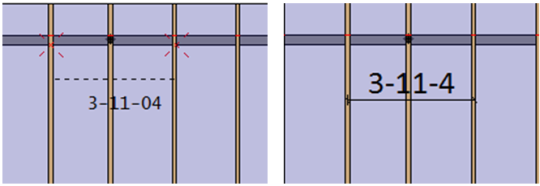
- Position the cursor at the location where you want the dimension to display and select the point. The dimension with the dashed line moves with the cursor.
The dimension is added at that location. The dimension line is displayed solid black and has tick marks at each end. At this point, the dimension becomes permanent and can be moved using the Move command.
Snap points are available so that additional dimensions can be aligned.
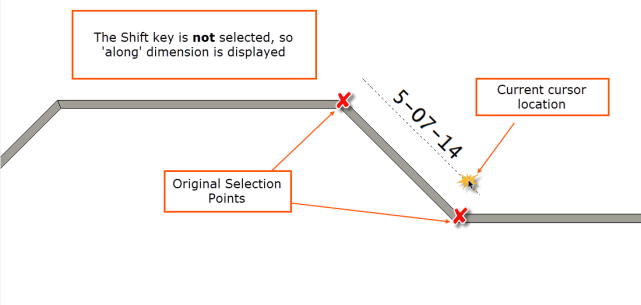
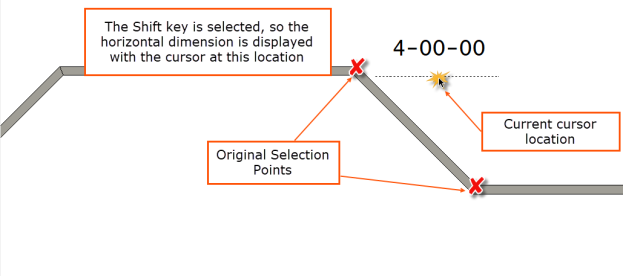
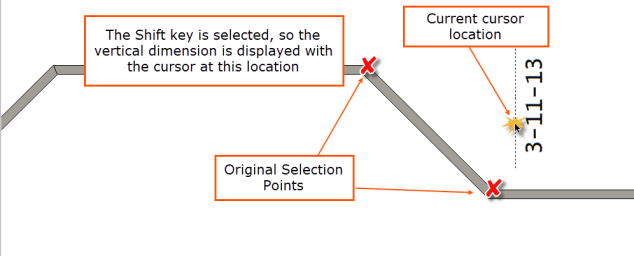
 Note: Select the first point and hold Shift to limit selection to either horizontal or vertical dimensions. If Shift is not selected, the dimension is the 'Along' dimension. If Shift is selected (and held down), the dimension is either a horizontal or vertical dimension, depending on where the cursor is moved.
- To exit the command, press Esc, right-click, or press Cancel.
Along Dimension example - Shift key is not selected
Horizontal Dimension - Shift key is selected and cursor is moved vertically
Vertical Dimension - Shift key is selected and cursor is moved horizontally
Note: Quick dimensions use the properties described in Create Labels. Dimension size and font are defined in the EnvData Font Settings.